How to Make Safe and Powerful Cleaning Wipes
Did you know there’s a super easy, effective, inexpensive alternative to those chemical-laden disinfecting kitchen wipes? I mean, we all want to have clean houses and get rid of dangerous bacteria and viruses, but do we want the side effects that go along with conventional cleaning products? Things like red, itchy, or peeling skin? Watery eyes? Sneeze attacks? Itchy nose or mouth? Breaking out in hives?
And that’s not all of it…people can have even more severe reactions than those (and those are bad enough!). Conventional disinfecting wipes from popular brands can cause coughing, difficulty breathing, nausea (which may or may not include vomiting), swelling of the throat or face, and/or asthma attacks. Ugh. No thanks.
But what if I told you that you could have the benefits of the wipes without the dangers? I made the switch myself 6 or 7 years ago, and I’ve never looked back. I want to empower you to do the same, so below, I’m sharing two different DIY cleaning/disinfecting wipes you can use instead of the conventional disinfecting wipes. I use both regularly, depending on what I have on hand. Feel free to do the same!
DIY Vinegar/Essential Oil Wipes
What you’ll need
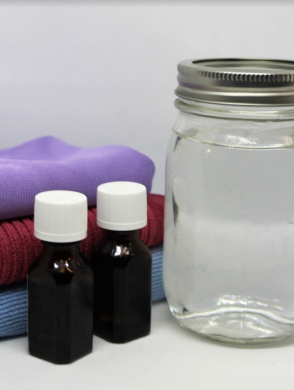
- Container to hold your wipes (a large glass jar, or even an old wipes container or baby wipes container, work well—just make sure your container has a leak-proof lid)
- Package of coffee filters OR microfiber cloths (cut to fit your container)
- ½ cup white vinegar
- ½ cup water (preferably distilled)
- 15-20 drops essential oil (tea tree, lemon, or Thieves blend)
Directions
- Combine all the liquid ingredients and shake or mix to combine (I usually do this in a mason jar, but a Tupperware container or some other container with a leak-proof lid works well too).
- Put your cloths or coffee filters into the container you want to store the wipes in. How many you use will depend on the size of your container.
- Pour your vinegar/water/oil solution over the cloths or filters.
- Close the container, then shake it well to make sure all the wipes are saturated. If you have a large container and your wipes aren’t saturated, you may need to make another batch of liquid solution. You want the wipes to be covered, but you don’t need a ton of excess liquid. (That being said, having extra solution in your container won’t hurt anything!)
- I usually store the container under the sink so it’s easy for me to get to when I need it. Whenever you need a wipe, just pull one out and use! If you used coffee filters, throw them away after each use. If you used cloths, you can wash and reuse them (coating them in solution first, of course).
Recipe adapted from Maple Holistics.
DIY Thieves Wipes
What you’ll need
- Container to hold your wipes (a large glass jar, or even an old wipes container or baby wipes container, work well—just make sure your container has a leak-proof lid)
- Package of coffee filters (when I can, I like to buy unbleached filters)
- ¼ cup Thieves Household Cleaner OR 25-30 drops of Thieves blend (if you don’t have thieves, you can use lemon or tea tree)
- 4-6 cups water (preferably distilled)
- Note: If using the essential oil instead of the Thieves Household Cleaner, you’ll need to add an emulsifier (an emulsifier is an ingredient that can bind the oil and water-based components of a recipe; e.g. soap). I like to use a few drops of Castile soap as an emulsifier, but you can also use Witch Hazel (if using Witch Hazel, try using a 1:1 ratio of Witch Hazel to oil).
Directions
- Fill your container about halfway full with the water.
- If using the Thieves Household Cleaner, add it to the water.
- If using the essential oils, combine them with the emulsifier, mix, then add them to the water.
- Put the lid on and shake well to combine.
- Add the coffee filters (the amount of filters you add will depend on the size of your container).
- Press them down until all of them are covered with the solution.
- Put the lid back on, turn the container upside down, and let it sit upside down for a few minutes to make sure that all the filters get a chance to soak up the solution.
- Turn the container back upright. Store in a cool, dry place (just like with the first option, I store these under my kitchen sink for convenience).
Click here for more resources and information on this topic.
Here is a round-up of products mentioned in the article for your shopping convenience!
- Container
- Coffee filters
- Microfiber cloths
- White vinegar
- Tea tree essential oil
- Lemon essential oil
- Thieves essential oil
- Thieves Household Cleaner
You can click the button below to go back to the Cleaning articles, or you can venture over to our DIY Cleaning recipes and the Cleaning supplies and products we love by clicking the buttons below!
Disclaimer: All information contained herein is intended for educational purposes only. It is not provided to diagnose, prevent, or treat any disease, illness, or injured condition for any human or animal, and Mother Nature’s Truths, as well as the author(s), contributor(s), publishers, and owners accept no responsibility for such use. Anyone suffering from any disease, illness, or injury, or who has an animal suffering from such, should consult with their physician or veterinarian. The statements herein have not been evaluated by the Food and Drug Administration.